Tuesday 29 April 2014

Getting the NSFileManager Reference:

I followed the Below Blog:

First we need to recap the steps necessary to obtain a reference to creatane an instance of the NSFileManager class. As discussed in the previous chapter, the NSFileManager class contains a class method named defaultManager that is used to create an instance of the class. For example:obtain a reference to the NSFileManager object instance:
NSFileManager *filemgr;
filemgr = [NSFileManager defaultManager];

Checking if a File Exists

The NSFileManager class contains an instance method named fileExistsAtPath that checks whether a specified file already exists. The method takes as an argument an NSString object containing the path to file and returns a boolean YES or NO value indicating the presence or otherwise of that file:
NSFileManager *filemgr;

filemgr = [NSFileManager defaultManager];

if ([filemgr fileExistsAtPath: @"/tmp/myfile.txt" ] == YES)
        NSLog (@"File exists");
else
        NSLog (@"File not found");

Comparing the Contents of Two Files

The contents of two files can be compared for equality using the contentsEqualAtPath method. This method takes as arguments the paths to the two files to be compared and returns a boolean YES or NO to indicate whether the file contents match:
NSFileManager *filemgr;

filemgr = [NSFileManager defaultManager];

if ([filemgr contentsEqualAtPath: @"/tmp/myfile.txt" andPath: @"/tmp/sales.txt"] == YES)
        NSLog (@"File contents match");
else
        NSLog (@"File contents do not match");

Checking if a File is Readable/Writable/Executable/Deletable

Most operating systems provide some level of file access control. These typically take the form of attributes that control the level of access to a file for each user or user group. As such, it is not a certainty that your program will have read or write access to a particular file, or the appropriate permissions to delete or execute it. The quickest way to find out if your program has a particular access permission is to use the isReadableFileAtPath, isWritableFileAtPath, isExecutableFileAtPath and isDeletableFileAtPath methods. Each method takes a single argument in the form of the path to the file to be checked and returns a boolean YES or NO result. For example, the following code excerpt checks to find out if a file is writable:
NSFileManager *filemgr;

filemgr = [NSFileManager defaultManager];

if ([filemgr isWritableFileAtPath: @"/tmp/myfile.txt"]  == YES)
        NSLog (@"File is writable");
else
        NSLog (@"File is read only");
To check for other access permissions simply substitute the corresponding method name in place of isWritableFileAtPath in this example.

Moving/Renaming a File

A file may be renamed (assuming adequate permissions) using the moveItemAtURL method. This method returns a boolean YES or NO result and takes as arguments the pathname for the file to be moved, the destination path and an optional NSError object into which information describing any errors encountered during the operation will be placed. If no error description information is required, this argument may be set to NULL. Note that if the destination file path already exists this operation will fail.
NSFileManager *filemgr;

filemgr = [NSFileManager defaultManager];

NSURL *oldPath = [NSURL fileURLWithPath:@"/tmp/myfile.txt"];
NSURL *newPath= [NSURL fileURLWithPath:@"/tmp/newfile.txt"];

[filemgr moveItemAtURL: oldPath toURL: newPath error: nil];

Copying a File

File copying can be achieved using the copyItemAtPath method. As with the move method, this takes as arguments the source and destination pathnames and an optional NSError object. Success of the operation is indicated by the returned boolean value:
NSFileManager *filemgr;

filemgr = [NSFileManager defaultManager];

if ([filemgr copyItemAtPath: @"/tmp/myfile.txt" toPath: @"/Users/demo/newfile.txt" error: NULL]  == YES)
        NSLog (@"Copy successful");
else
        NSLog (@"Copy failed");


Removing a File

The removeItemAtPath method removes the specified file from the file system. The method takes as arguments the pathname of the file to be removed and an optional NSError object. The success of the operation is, as usual, reported in the form of a boolean YES or NO return value:
NSFileManager *filemgr;

filemgr = [NSFileManager defaultManager];

if ([filemgr removeItemAtPath: @"/tmp/myfile.txt" error: NULL]  == YES)
        NSLog (@"Remove successful");
else
        NSLog (@"Remove failed");

Creating a Symbolic Link

A symbolic link to a particular file may be created using the createSymbolicLinkAtPath method. This takes as arguments the path of the symbolic link, the path to the file to which the link is to refer and an optional NSError object. For example, the following code creates a symbolic link from/tmpUsers/demo/myfile21.txt that links to the pre-existing file /tmp/myfile.txt:
NSFileManager *filemgr;

filemgr = [NSFileManager defaultManager];

if ([filemgr createSymbolicLinkAtPath: @"/tmp/myfile2.txt"
                withDestinationPath: @"/tmp/myfile.txt" error: NULL] == YES)
        NSLog (@"Link successful");
else
        NSLog (@"Link failed");NSFileManager *filemgr;

filemgr = [NSFileManager defaultManager];

if ([filemgr createSymbolicLinkAtPath: @"/Users/demo/file1.txt" 
                withDestinationPath: @"/tmp/myfile.txt" error: NULL] == YES)
        NSLog (@"Remove successful");
else
        NSLog (@"Remove failed");

Reading and Writing Files with NSFileManager

The NSFileManager class includes some basic file reading and writing capabilities. these capabilities are somewhat limited when compared to the options provided by the NSFileHandle class, but can be useful nonetheless.
Firstly, the contents of a file may be read and stored in an NSData object through the use of the contentsAtPath method:
NSFileManager *filemgr;
NSData *databuffer;

filemgr = [NSFileManager defaultManager];

databuffer = [filemgr contentsAtPath: @"/tmp/myfile.txt" ];
Having stored the contents of a file in an NSData object, that data may subsequently be written out to a new file using the createFileAtPath method:
databuffer = [filemgr contentsAtPath: @"/tmp/myfile.txt" ];

[filemgr createFileAtPath: @"/tmp/newfile.txt" contents: databuffer attributes: nil];


In the above example we have essentially copied the contents from an existing file to a new file. This, however, gives us no control over how much data is to be read or written and does not allow us to append data to the end of an existing file. If the file /tmp/newfile.txt in the above example had already existed it, and any data it contained, would have been overwritten by the contents of the source file. Clearly some more flexible mechanism is required. This is provided by the Foundation Framework in the form of the NSFileHandle class.

Working with Files using the NSFileHandle Class

The NSFileHandle class provides a range of methods designed to provide a more advanced mechanism for working with files. In addition to files, this class can also be used for working with devices and network sockets. In the following sections we will look at some of the more common uses for this class.

Creating an NSFileHandle Object

An NSFileHandle object can be created when opening a file for reading, writing or updating (reading and writing). This is achieved using the fileHandleForReadingAtPath, fileHandleForWritingAtPath and fileHandleForUpdatingAtPath methods respectively. Having opened a file, it must subsequently be closed when we have finished working with it using the closeFile method. If an attempt to open a file fails, for example because an attempt is made to open a non-existent file for reading, these methods return nil.
For example, the following code excerpt opens a file for reading and writing and then closes it without actually doing anything to the file:
NSFileHandle *file;

file = [NSFileHandle fileHandleForWritingAtPath: @"/tmp/myfile.txt"];

if (file == nil)
        NSLog(@"Failed to open file");

[file closeFile];

NSFileHandle File Offsets and Seeking

NSFileHandle objects maintain a pointer to the current position in a file. This is referred to as the offset. When a file is first opened the offset is set to 0 (the beginning of the file). This means that any read or write operations we perform using the NSFileHandle methods will take place at offset 0 in the file. To perform operations at different locations in a file (for example to append data to the end of the file) it is first necessary to seek to the required offset. For example to move the current offset to the end of the file, use the seekToEndOfFile method. Alternatively, seekToFileOffset allows you to specify the precise location in the file to which the offset is to be positioned. Finally, the current offset may be identified using the offsetInFile method. In order to accommodate large files, the offset is stored in the form of an unsigned long long.
The following example opens a file for reading and then performs a number of method calls to move the offset to different positions, outputting the current offset after each move:
NSFileHandle *file;

file = [NSFileHandle fileHandleForUpdatingAtPath: @"/tmp/myfile.txt"];

if (file == nil)
        NSLog(@"Failed to open file");

NSLog (@"Offset = %llu", [file offsetInFile]);

[file seekToEndOfFile];

NSLog (@"Offset = %llu", [file offsetInFile]);

[file seekToFileOffset: 30];

NSLog (@"Offset = %llu", [file offsetInFile]);

[file closeFile];
File offsets are a key aspect of working with files using the NSFileHandle class so it is worth taking extra time to make sure you understand the concept. Without knowing where the current offset is in a file it is impossible to know where in the file data will be read or written.

Reading Data from a File

Once a file has been opened and assigned a file handle, the contents of that file may be read from the current offset position. The readDataOfLength method reads a specified number of bytes of data from the file starting at the current offset. For example, the following code reads 5 bytes of data from offset 10 in a file. The data read is returned encapsulated in an NSData object:
NSFileHandle *file;
NSData *databuffer;

file = [NSFileHandle fileHandleForReadingAtPath: @"/tmp/myfile.txt"];

if (file == nil)
        NSLog(@"Failed to open file");

[file seekToFileOffset: 10];

databuffer = [file readDataOfLength: 5];

[file closeFile];
Alternatively, the readDataToEndOfFile method will read all the data in the file starting at the current offset and ending at the end of the file.

Writing Data to a File

The writeData method writes the data contained in an NSData object to the file starting at the location of the offset. Note that this does not insert data but rather overwrites any existing data in the file at the corresponding location.
To see this in action we need to begin with a file. Using a text editor, create a file named quickfox.txt, enter the following text and save it in the /tmp directory:
The quick brown fox jumped over the lazy dog
Next, we will write a program that opens the file for updating, seeks to position 10 and then writes some data at that location:
#import <Foundation/Foundation.h>

int main (int argc, const char * argv[])
{
    @autoreleasepool {

        NSFileHandle *file;
        NSMutableData *data;

        const char *bytestring = "black dog";

        data = [NSMutableData dataWithBytes:bytestring length:strlen(bytestring)];


        file = [NSFileHandle fileHandleForUpdatingAtPath: @"/tmp/quickfox.txt"];

        if (file == nil)
                NSLog(@"Failed to open file");


        [file seekToFileOffset: 10];

        [file writeData: data];

        [file closeFile];

    }
    return 0;
}
When the above program is compiled and executed the contents of the quickfox.txt will have changed to:
The quick black dog jumped over the lazy dog

Truncating a File

A file may be truncated at the specified offset using the truncateFileAtOffset method. To delete the entire contents of a file, specify an offset of 0 when calling this method:
        NSFileHandle *file;

        file = [NSFileHandle fileHandleForUpdatingAtPath: @"/tmp/quickfox.txt"];

        if (file == nil)
                NSLog(@"Failed to open file");

        [file truncateFileAtOffset: 0];

        [file closeFile];

Monday 28 April 2014


how to increase font size in UIWebView:

I have 2 buttons - A- and A+ : 
 
NSUInteger textFontSize;

- (IBAction)changeTextFontSize:(id)sender
{
    switch ([sender tag]) {
        case 1: // A-
            textFontSize = (textFontSize > 50) ? textFontSize -5 : textFontSize;
            break;
        case 2: // A+
            textFontSize = (textFontSize < 160) ? textFontSize +5 : textFontSize;
            break;
    }

    NSString *jsString = [[NSString alloc] initWithFormat:
             @"document.getElementsByTagName('body')[0].style.webkitTextSizeAdjust 
             = '%d%%'",ctextFontSize];
    [web stringByEvaluatingJavaScriptFromString:jsString];
}

Wednesday 23 April 2014

UIDeviceHardware - Determine iOS device being used :

UIDeviceHardware.h

//
// UIDeviceHardware.h
//
// Used to determine EXACT version of device software is running on.
#import <Foundation/Foundation.h>
@interface UIDeviceHardware : NSObject
 
- (NSString *) platform;
- (NSString *) platformString;
@end
UIDeviceHardware.m 

// 
// UIDeviceHardware.m
//
// Used to determine EXACT version of device software is running on.
 
#import "UIDeviceHardware.h"
#include <sys/types.h>
#include <sys/sysctl.h>
@implementation UIDeviceHardware
- (NSString *) platform{
size_t size;
sysctlbyname("hw.machine", NULL, &size, NULL, 0);
char *machine = malloc(size);
sysctlbyname("hw.machine", machine, &size, NULL, 0);
NSString *platform = [NSString stringWithUTF8String:machine];
free(machine);
return platform;
}
- (NSString *) platformString{
NSString *platform = [self platform];
    if ([platform isEqualToString:@"iPhone1,1"])    return @"iPhone 1G";
    if ([platform isEqualToString:@"iPhone1,2"])    return @"iPhone 3G";
    if ([platform isEqualToString:@"iPhone2,1"])    return @"iPhone 3GS";
    if ([platform isEqualToString:@"iPhone3,1"])    return @"iPhone 4";
    if ([platform isEqualToString:@"iPhone3,3"])    return @"Verizon iPhone 4";
    if ([platform isEqualToString:@"iPhone4,1"])    return @"iPhone 4S";
    if ([platform isEqualToString:@"iPhone5,1"])    return @"iPhone 5 (GSM)";
    if ([platform isEqualToString:@"iPhone5,2"])    return @"iPhone 5 (GSM+CDMA)";
    if ([platform isEqualToString:@"iPhone5,3"])    return @"iPhone 5c (GSM)";
    if ([platform isEqualToString:@"iPhone5,4"])    return @"iPhone 5c (Global)";
    if ([platform isEqualToString:@"iPhone6,1"])    return @"iPhone 5s (GSM)";
    if ([platform isEqualToString:@"iPhone6,2"])    return @"iPhone 5s (Global)";
    if ([platform isEqualToString:@"iPod1,1"])      return @"iPod Touch 1G";
    if ([platform isEqualToString:@"iPod2,1"])      return @"iPod Touch 2G";
    if ([platform isEqualToString:@"iPod3,1"])      return @"iPod Touch 3G";
    if ([platform isEqualToString:@"iPod4,1"])      return @"iPod Touch 4G";
    if ([platform isEqualToString:@"iPod5,1"])      return @"iPod Touch 5G";
    if ([platform isEqualToString:@"iPad1,1"])      return @"iPad";
    if ([platform isEqualToString:@"iPad2,1"])      return @"iPad 2 (WiFi)";
    if ([platform isEqualToString:@"iPad2,2"])      return @"iPad 2 (GSM)";
    if ([platform isEqualToString:@"iPad2,3"])      return @"iPad 2 (CDMA)";
    if ([platform isEqualToString:@"iPad2,4"])      return @"iPad 2 (WiFi)";
    if ([platform isEqualToString:@"iPad2,5"])      return @"iPad Mini (WiFi)";
    if ([platform isEqualToString:@"iPad2,6"])      return @"iPad Mini (GSM)";
    if ([platform isEqualToString:@"iPad2,7"])      return @"iPad Mini (GSM+CDMA)";
    if ([platform isEqualToString:@"iPad3,1"])      return @"iPad 3 (WiFi)";
    if ([platform isEqualToString:@"iPad3,2"])      return @"iPad 3 (GSM+CDMA)";
    if ([platform isEqualToString:@"iPad3,3"])      return @"iPad 3 (GSM)";
    if ([platform isEqualToString:@"iPad3,4"])      return @"iPad 4 (WiFi)";
    if ([platform isEqualToString:@"iPad3,5"])      return @"iPad 4 (GSM)";
    if ([platform isEqualToString:@"iPad3,6"])      return @"iPad 4 (GSM+CDMA)";
    if ([platform isEqualToString:@"iPad4,1"])      return @"iPad Air (WiFi)";
    if ([platform isEqualToString:@"iPad4,2"])      return @"iPad Air (GSM)";
    if ([platform isEqualToString:@"iPad4,4"])      return @"iPad Mini Retina (WiFi)";
    if ([platform isEqualToString:@"iPad4,5"])      return @"iPad Mini Retina (GSM)";
    if ([platform isEqualToString:@"i386"])         return @"Simulator";
    if ([platform isEqualToString:@"x86_64"])       return @"Simulator";
return platform;
}
@end

Wednesday 16 April 2014


How to Install Xcode, Homebrew, Git, RVM, Ruby & Rails on Snow Leopard, Lion, and Mountain Lion: 

Original Blog Post is here : http://www.moncefbelyamani.com/how-to-install-xcode-homebrew-git-rvm-ruby-on-mac/

Step : Install Homebrew

Homebrew, “the missing package manager for OS X,” allows you to easily install hundreds of open-source tools. The full instructions are at https://github.com/mxcl/homebrew/wiki/installation, but you should only need to run this:
1
$ ruby -e "$(curl -fsSL https://raw.github.com/mxcl/homebrew/go/install)"
Run the command, and follow the instructions when prompted, as highlighted in the screenshot below. Note that Terminal does not provide visual feedback when you type your password. Just type it slowly and press return.install homebrew on mountain lion
Once the installation is successful, run the following command:
1
$ brew doctor
If you get Your system is ready to brew, you can move on to Step 4. Otherwise, continue reading to learn how to fix errors and warnings you might run into.If you get Warning: Experimental support for using Xcode without the "Command Line Tools", you probably upgraded from Lion to Mountain Lion but didn’t reinstall the Command Line Tools. See the important note in Step 1.
If you get Error: No such file or directory - /usr/local/Cellar, run the following command, which creates the /usr/local/Cellar directory:
1
$ sudo mkdir /usr/local/Cellar
sudo allows you to run commands as a user with higher access rights, which is why it prompts you for your password, and mkdir stands for “make directory.”If you get /usr/local/etc isn't writable or Cannot write to /usr/local/Cellar (or any other directory inside /usr/local), fix it with this command:
1
$ sudo chown -R `whoami` /usr/local
This makes you the owner of the /usr/local directory, in addition to all nested directories.chown stands for “change owner,” the -R flag applies this to all nested files and directories, and whoami is a variable that represents your OS X username. You should copy and paste the command above as is.
To learn more about any Unix command, type man (for “manual”), followed by the command. For example:
1
$ man chown
If a manual is longer than a page long, it will display a : at the end to signify there is more to read. To display one additional line at a time, press return. To display an additional page at a time, press the space bar. To quit at any time, press q.Run brew doctor again. If you get Your system is ready to brew, you can move on to the next step. If you get Warning: /usr/bin occurs before /usr/local/bin, run this:
1
$ echo 'export PATH="/usr/local/bin:/usr/local/sbin:~/bin:$PATH"' >> ~/.bash_profile
This command takes everything between the single quotes and adds it (>>) to a file called .bash_profile in your user’s root directory (~/). Every time you open a new Terminal window or tab, .bash_profile is called. The export PATH line tells your system to look in /usr/local/bin first. In Step 4, I explain why this is important.Quit and relaunch Terminal, then run brew doctor once more. Your system should be ready to brew now.
If you’re on Lion, you might get this:
1
2
3
4
5
6
7
8
9
10
Warning: Your Xcode is configured with an invalid path.
You should change it to the correct path. Please note that there is no correct
path at this time if you have *only* installed the Command Line Tools for Xcode.
If your Xcode is pre-4.3 or you installed the whole of Xcode 4.3 then one of
these is (probably) what you want:

    sudo xcode-select -switch /Developer
    sudo xcode-select -switch /Applications/Xcode.app/Contents/Developer

DO NOT SET / OR EVERYTHING BREAKS!
This should fix it:
1
$ sudo xcode-select -switch /Applications/Xcode.app/Contents/Developer
Run brew doctor to verify. Your system should be ready to brew now.

Step : Install RVM with the latest Ruby (2.0.0) and Rails (3.2.13)

RVM stands for Ruby Version Manager, and is one of the most popular tools that allow you to install and manage multiple versions of Ruby and Rails on the same computer.
RVM has come a long way since I originally published this tutorial. As of March 30, 2013, you can now install the latest RVM, Ruby, and Rails in one step with this command:
1
$ \curl -L https://get.rvm.io | bash -s stable --rails --autolibs=enable
I verified this on a clean installation of Mountain Lion 10.8.3, but I have not tested it on Snow Leopard or Lion.This will take a few minutes, and once it’s done, quit and relaunch Terminal, then run this command:
1
$ type rvm | head -1
If you get rvm is a function, that means RVM was successfully installed. If not, go to the Troubleshooting section.To make sure the latest versions of RVM, Ruby and Rails were installed, run the commands below:
For RVM
1
$ rvm -v
You should get rvm 1.19.1 or higher.For Ruby
1
$ ruby -v
You should get ruby 2.0.0p0 or higher.For Rails
1
$ rails -v
You should get Rails 3.2.13 or higher.To make sure your system is still ready to brew:
1
$ brew doctor
If everything went well, you’re done! Your machine is now set up with the basic tools for web development.If you run into any other issues, please let me know and I will do my best to help you. If you got any value out of my tutorial, I have more time-saving tips and tricks for you in my free newsletter. If you’re feeling really appreciative, you can also donate, which will automatically give you a discount for any paid courses I will release in 2014.

Troubleshooting

In some cases, brew doctor might show you this warning:
1
2
3
4
5
6
7
8
9
10
11
12
Warning: Some keg-only formula are linked into the Cellar.
Linking a keg-only formula, such as gettext, into the cellar with
`brew link <formula>` will cause other formulae to detect them during
the `./configure` step. This may cause problems when compiling those
other formulae.

Binaries provided by keg-only formulae may override system binaries
with other strange results.

You may wish to `brew unlink` these brews:

libxml2
Homebrew messages are generally very helpful and they let you know exactly what to do. In this case, it is telling you to fix the linking issue by running brew unlink, followed by the tools (or “brews”) that need to be unlinked. Here, there is only one tool that needs to be unlinked. Therefore, you should run this command:
1
brew unlink libxml2
If it listed more than one tool, you would add them to the command separated by a space, like so:
1
brew unlink tool1 tool2 tool3
Run brew doctor once more, and you should be ready to brew now.

How to load RVM into your shell session as a function

Run this command:
1
$ echo '[[ -s "$HOME/.rvm/scripts/rvm" ]] && . "$HOME/.rvm/scripts/rvm" # Load RVM function' >> ~/.bash_profile
Just like the command we saw in Step 4, this adds everything between the single quotes to your .bash_profile, which ensures that every time you start a new Terminal session, you will be able to use all of RVM’s commands.Now that .bash_profile has been modified, it needs to be reloaded. For initial RVM installations, the preferred way to do this is to quit and relaunch Terminal. Otherwise, you can use the following command:
1
$ source ~/.bash_profile
If all went well, you should see rvm is a function after you run this command:
1
$ type rvm | head -1

Next Steps

Once you start hacking away on your computer, you will most likely need to install more tools with Homebrew. Before you do, remember to always run brew update and brew doctor to make sure your system is still ready to brew. To upgrade your existing packages, run brew upgrade.
If you installed the full Xcode package, remember that when you update it via the Mac App Store, you might also need to update the Command Line Tools via Xcode’s Preferences. If you installed the standalone CLT, I recommend checking for a new version once a month or so.
If you followed this tutorial because you’re interested in Rails development, I recommend visiting Daniel Kehoe’s excellent RailsApps Project.
If you want to install another version of Ruby besides 2.0.0, follow the instructions below.

Installing other versions of Ruby, such as 1.9.3

Before you install a version of Ruby with RVM, you should make sure you have the latest version of RVM:
1
$ rvm get stable --autolibs=enable
Then run:
1
$ rvm install 1.9.3
To see all the versions of Ruby installed via RVM:
1
$ rvm list rubies
This output also lets you know which version is the default and which one is the current one in use.To use a specific version (2.0.0 in the example below) and also set it as the default version for new shell sessions:
1
$ rvm use 2.0.0 --default
To verify:
1
$ ruby -v
The version should match that of the current Ruby in use.

Previous Notes

Installing Ruby on Snow Leopard and Lion is presumably as easy as on Mountain Lion, but I haven’t been able to verify that. The instructions below are based on my experience in 2012. I’ve left them here for reference but I’m not sure if they still apply. For example, running rvm requirements used to provide instructions specific to your environment, but now it tries to install all the requirements for you.
The screenshots below are examples of the kind of output rvm requirements would show. One is for Snow Leopard 10.6.8 with Xcode 4.2, and the other for Mountain Lion 10.8 with no Xcode:
configure rvm
didn't have to install libksba on mountain lion
According to the requirements, we must first install libksba. This applies to Snow Leopard, Lion and Mountain Lion.
We can do that easily with Homebrew, but first we should make sure it is up to date:
1
2
$ brew update
$ brew install libksba
Since Homebrew is updated regularly, it’s advisable to run brew update before installing anything with Homebrew.Now we’re finally ready to install Ruby 1.9.3! If you’re on Snow Leopard, you need to add a flag to the command (as specified in the RVM requirements):
1
$ rvm install 1.9.3  --with-gcc=clang
install ruby 1.9.3If you’re on Lion, you need to install automake first:
1
2
$ brew install automake
$ rvm install 1.9.3
Otherwise, you will get this error when installing Ruby 1.9.3:
1
rvm requires autoreconf to install the selected ruby interpreter however autoreconf was not found in the PATH.
rvm install 1.9.3 on lion
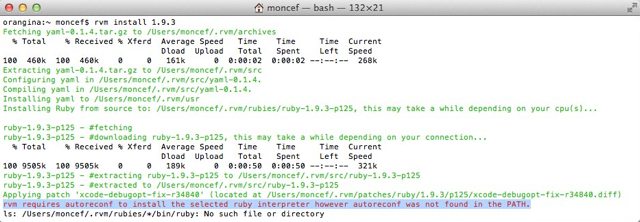
If you’re on Mountain Lion 10.8.2 with Xcode 4.5, you will need to run these commands first:
1
2
3
4
5
6
$ brew update
$ brew tap homebrew/dupes
$ brew install autoconf automake apple-gcc42
$ rvm pkg install openssl
$ rvm install 1.9.3 (or `rvm reinstall all --force` in case you had already installed ruby)
$ sudo ln -s /usr/local/bin/gcc-4.2 /usr/bin/gcc-4.2
The steps above are necessary for you to be able to install Ruby gems, such as Rails. Otherwise, you will run into errors such as these:
1
2
3
4
5
6
7
8
9
ERROR: Failed to build gem native extension

make: /usr/bin/gcc-4.2: No such file or directory

Could not create Makefile due to some reason, probably lack of necessary libraries and/or headers

The compiler failed to generate an executable file

You have to install development tools first

Tuesday 15 April 2014

How To Create Circular Diplay Picture and Rounded Corner..!!!!!

How To Create Circular Diplay Picture and Rounded Corner..!!!!!

UIImageView *imageview = [UIImageView alloc] init];
imageview.layer.cornerRadius = imageview.frame.size.width / 2;
imageview.layer.borderWidth = 3.0f;
imageview.layer.borderColor = [UIColor whiteColor].CGColor;
imageview.clipsToBounds = YES;

Friday 11 April 2014


Passing Data between View Controllers :

Passing Data Forward

Passing data forward to a view controller from another view controller. You would use this method if you wanted to pass an object/value from one view controller to another view controller that you may be pushing on to a navigation stack.

For this example we will have ViewControllerA and ViewControllerB
To pass a BOOL value from ViewControllerA to ViewControllerB we would do the following.
  1. in ViewControllerB.h create a property for the BOOL
    @property(nonatomic) BOOL *isSomethingEnabled;
     
  2. in ViewControllerA you need to tell it about ViewControllerB so use an
    #import "ViewControllerB.h"
     
    Then where you want to load the view eg. didSelectRowAtIndex or some IBAction you need to set the property in ViewControllerB before you push it onto nav stack.

    ViewControllerB *viewControllerB = [[ViewControllerB alloc] 
                          initWithNib:@"ViewControllerB" bundle:nil];
    viewControllerB.isSomethingEnabled = YES;
    [self pushViewController:viewControllerB animated:YES];
     
    This will set isSomethingEnabled in ViewControllerB to BOOL value YES.
Passing Data Forward using Segue's : 

If you are using Storyboards you are most likely using segues and will need this procedure to pass data forward. This is similar to the above but instead of passing the data before you push the view controller, you use a method called

-(void)prepareForSegue:(UIStoryboardSegue *)segue sender:(id)sender

So to pass a BOOL from ViewControllerA to ViewControllerB we would do the following:
  1. in ViewControllerB.h create a property for the BOOL
    @property(nonatomic) BOOL *isSomethingEnabled;
     
  2. in ViewControllerA you need to tell it about ViewControllerB so use an
    #import "ViewControllerB.h"
     
  3. Create a the segue from ViewControllerA to ViewControllerB on the storyboard and give it an identifier, in this example we'll call it "showDetailSegue".

  4. Next we need to add the method to ViewControllerA that is called when any segue is performed, because of this we need to detect which segue was called and then do something. In our example we will check for "showDetailSegue" and if thats performed we will pass our BOOL value to ViewControllerB

    -(void)prepareForSegue:(UIStoryboardSegue *)segue sender:(id)sender{
        if([segue.identifier isEqualToString:@"showDetailSegue"]){
            ViewControllerB *controller = 
                           (ViewControllerB *)segue.destinationViewController;
            controller.isSomethingEnabled = YES;
        }
    }
     
    If you have your views embedded in a navigation controller you need to change the method above slightly to the following :

    -(void)prepareForSegue:(UIStoryboardSegue *)segue sender:(id)sender{
        if([segue.identifier isEqualToString:@"showDetailSegue"]){
            UINavigationController *navController = 
                                (UINavigationController *)segue.destinationViewController;
            ViewControllerB *controller = 
                                (ViewControllerB *)navController.topViewController;
            controller.isSomethingEnabled = YES;
        }
    }
     
    This will set isSomethingEnabled in ViewControllerB to BOOL value YES.

Passing Data Back

To pass data back from ViewControllerB to ViewControllerA you need to use Protocols and Delegates or Blocks, the latter can be used as a loosely coupled mechanism for callbacks.
To do this we will make ViewControllerA a delegate of ViewControllerB. This allows ViewControllerB to send a message back to ViewControllerA enabling us to send data back.
For ViewControllerA to be delegate of ViewControllerB it must conform to ViewControllerB's protocol which we have to specify. This tells ViewControllerA which methods it must implement.
  1. In ViewControllerB.h, below the #import, but above @interface you specify the protocol.

    @class ViewControllerB;
    
    @protocol ViewControllerBDelegate <NSObject>
    - (void)addItemViewController:(ViewControllerB *)controller 
            didFinishEnteringItem:(NSString *)item;
    @end
     
  2. next still in the ViewControllerB.h you need to setup a delegate property and synthesize in ViewControllerB.m

    @property (nonatomic, weak) id <ViewControllerBDelegate> delegate;
     
  3. In ViewControllerB we call a message on the delegate when we pop the view controller.

    NSString *itemToPassBack = @"Pass this value back to ViewControllerA";
    [self.delegate addItemViewController:self didFinishEnteringItem:itemToPassBack];
     
  4. That's it for ViewControllerB. Now in ViewControllerA.h, tell ViewControllerA to import ViewControllerB and conform to its protocol..

    #import "ViewControllerB.h"
    
    @interface ViewControllerA : UIViewController <ViewControllerBDelegate>
     
  5. In ViewControllerA.m implement the following method from our protocol

    - (void)addItemViewController:(ViewControllerB *)controller 
            didFinishEnteringItem:(NSString *)item
    {
        NSLog(@"This was returned from ViewControllerB %@",item);
    }
     
  6. The last thing we need to do is tell ViewControllerB that ViewControllerA is its delegate before we push ViewControllerB on to nav stack.

    ViewControllerB *viewControllerB = [[ViewControllerB alloc] 
                                       initWithNib:@"ViewControllerB" bundle:nil];
    viewControllerB.delegate = self
    [[self navigationController] pushViewController:viewControllerB animated:YES];

References

Wednesday 9 April 2014

How to assign Custom tag or value to UIButton or Any Component?

For Other Way to assign Custom object to Components: 
Please Refer this Post :
  1. http://labs.vectorform.com/2011/07/objective-c-associated-objects/ 
  2. http://nsscreencast.com/episodes/81-associated-objects

Here is a UIButton in below Code : 

UIButton *SubCatBtn = [UIButton buttonWithType:UIButtonTypeCustom];
SubCatBtn.frame = CGRectMake(197, 9, 150, 50);
[SubCatBtn setTitle:@"Sample" forState:UIControlStateNormal];
SubCatBtn.titleLabel.textColor = [UIColor whiteColor];
SubCatBtn.titleLabel.font = [UIFont systemFontOfSize:16.5f];
SubCatBtn.titleLabel.numberOfLines = 0;
SubCatBtn.titleLabel.textAlignment = NSTextAlignmentLeft;
SubCatBtn.titleLabel.lineBreakMode = NSLineBreakByWordWrapping;[SubCatBtn addTarget:self action:@selector(btnClicked:) forControlEvents:UIControlEventTouchUpInside];


If You want a custom tag or property or attribute to this uibutton, then you can use the UIButton Layer Method for that.

You can use the layer property. Add the object you want to pass as the value in the layer dictionary.

[[SubCatBtn layer] setValue:@"jigar" forKey:@"name"];
 
 
This yourObj is accessible from the button action function:

-(void)btnClicked:(id)sender
{
    id yourObj = [[sender layer] valueForKey:@"name"];
}
 
 
With this method you can pass multiple values to the button function just by adding new objects in the dictionary with different keys.

Objective C: Detect start of bouncing effect for UIScrollView?

static BOOL _draggingView = NO;

- (
void)scrollViewWillBeginDragging:(UIScrollView *)scrollView {
        _draggingView = YES;

}

- (void)scrollViewDidEndDragging:(UIScrollView *)scrollView willDecelerate:
(BOOL)decelerate {

      
_draggingView = NO;

}

- (void)scrollViewDidScroll:(UIScrollView *)scrollView {
        NSInteger pullingDetectFrom = 50;
 
       if
(self.contentOffset.y < -pullingDetectFrom) {
           _draggingView = NO;
            NSLog(@"Pull Down");
      
        }
else if (self.contentSize.height <= self.frame.size.height && self.contentOffset.y > pullingDetectFrom) {
            _draggingView = NO;
            NSLog(@"Pull Up");
       
        }
else if (self.contentSize.height > self.frame.size.height &&
       self.contentSize.height-self.frame.size.height-self.contentOffset.y < -pullingDetectFrom) {
          _draggingView = NO;
           NSLog(@"Pull Up");
        }

}

Monday 7 April 2014

How to convert JSON to NSString and NSString to JSON Data?

How to convert NSDictionary to NSString which contains JSON of NSDictionary or NSMutableArray ?

This trick is also usefull for insert the JSON of NSMutableArray or NSMutableDictionary to Sqlite Database.

Example :

Check this : http://stackoverflow.com/questions/14864088/how-to-convert-nsdictionary-to-nsstring-which-contains-json-of-nsdictionary

NSData *jsonData = [NSJSONSerialization dataWithJSONObject:
                                             jsonObject
                                        options:0
                                        error:nil];
NSString *node_array_val = [[NSString alloc] initWithData:jsonData
                                             encoding:NSUTF8StringEncoding];
 
Now Add this string to Sqlite Databse Table. 
And How to get this string and convert to this string to 
NSMutableArray or NSMutabledictionary : 
 
Example : 

Check this  : http://stackoverflow.com/questions/18736250/converting-nsstring-to-nsdictionary-json


NSString *jsonString = @"{\"ID\":{\"Content\":268,\"type\":\"text\"},
                          \"ContractTemplateID\":{\"Content\":65,\"type\":\"text\"}}";
 
NSData *data = [jsonString dataUsingEncoding:NSUTF8StringEncoding];
id json = [NSJSONSerialization JSONObjectWithData:data options:0 error:nil];
Now if you do following NSLog statement

NSLog(@"%@",[json objectForKey:@"ID"]);
Result would be another NSDictionary.

{ Content = 268; type = text; }


Thursday 3 April 2014

Visual Language Format Examples :

I followed below this post : http://www.techotopia.com/index.php/Understanding_the_iOS_6_Auto_Layout_Visual_Format_Language

The visual format language is not a new programming language in the way that C++, Java and Objective-C are all programming languages. Instead, the visual format language defines a syntax through which auto layout constraints may be created using sequences of ASCII characters. These visual format character sequences are then turned into constraints by passing them through to the constraintsWithVisualFormat: method of the NSLayoutConstraint class.
What makes the language particularly appealing and intuitive is that the syntax used to define a constraint involves characters sequences that, to a large extent, visually represent the constraint that is being created.

By far the easiest way to understand the concepts behind the visual format language is to look at some examples of the syntax. Take for example, visual format language syntax to describe a view object:

[mybutton]
 
 
As we can see, view objects are described in the visual format language by surrounding the view name with square brackets ([]).
Two views may be constrained to be positioned flush with each other by placing the views side by side in the visual format string:

[mybutton1][mybutton2]
 

Similarly, a horizontal spacer between two view objects is represented by a hyphen:
 
[mybutton1]-[mybutton2]
 
 
The above example instructs the auto layout system to create a constraint using the standard spacing for views. The following construct, on the other hand, specifies a spacing distance of 30 points between the two views:
 
[mybutton1]-30-[mybutton2]


By default, constraints of the type outlined above are assumed to be horizontal constraints. Vertical constraints are declared using a V: prefix. For example, the following syntax establishes a vertical spacing constraint between two views:
 
V:[mylabel]-50-[mybutton]
 

For consistency and completeness, horizontal constraints may, optionally, be prefixed with H:.
The width of a view can be set specifically as follows:
 
[mybutton(100)]


Alternatively, inequality can be used:
 
[mybutton(<=100)]


Using similar syntax, the width of one view can be constrained to match that of a second view:
 
[mylabel(==mybutton2)]


When using the visual format language, the superview of the view for which the constraint is being described is represented by the | character. For example, the following visual format language construct declares a constraint for the mybutton1 view that attaches the leading and trailing edges of the view to the left and right edges of the containing superview with a spacing of 20 and 30 points respectively:
 
|-20-[mybutton1]-30-|


The language also allows priorities to be declared. The following excerpt specifies that the width of mybutton1 must be greater than, or equal to 70 points with a priority value of 500:
 
[mybutton1(>=70@500)]


Of particular importance, however, is the fact that the language may be used to construct multiple constraints in a single sequence, for example:
 
V:|-20-[mybutton1(>=70@500)]-[mybutton2(==mybutton1)]-30-[mybutton3]-|